
Form Connector – Google Spreadsheet
In this article:
One of the easiest ways to automate your process is to connect your form data entries to a Google Spreadsheet.
For example, if a timesheet form is captured, it would be helpful if that information appeared in a timesheet spreadsheet. This is where the Google Spreadsheet Connector for Forms comes in.
Requires an authenticated Google Connection before any form connectors can be added.
Adding the Connector
Follow these steps to add the connector to your specific form:
- Navigate to Forms > Create/Edit Forms.
- Hover over your desired form and click the Connect icon.
- Click the Add Connector button (top-right).
- Select Google Spreadsheet from the options.
Note: The page will refresh with the connector added. Changes are not live until you click Save.
Quick Access Tip
If you are already inside the Form Builder or Settings view, you don’t need to go back to the main menu. Simply click the Connectors tab located directly under the form title at the top of the screen.
Configuring the Connector
After adding the form connector, the following configuration options are available.
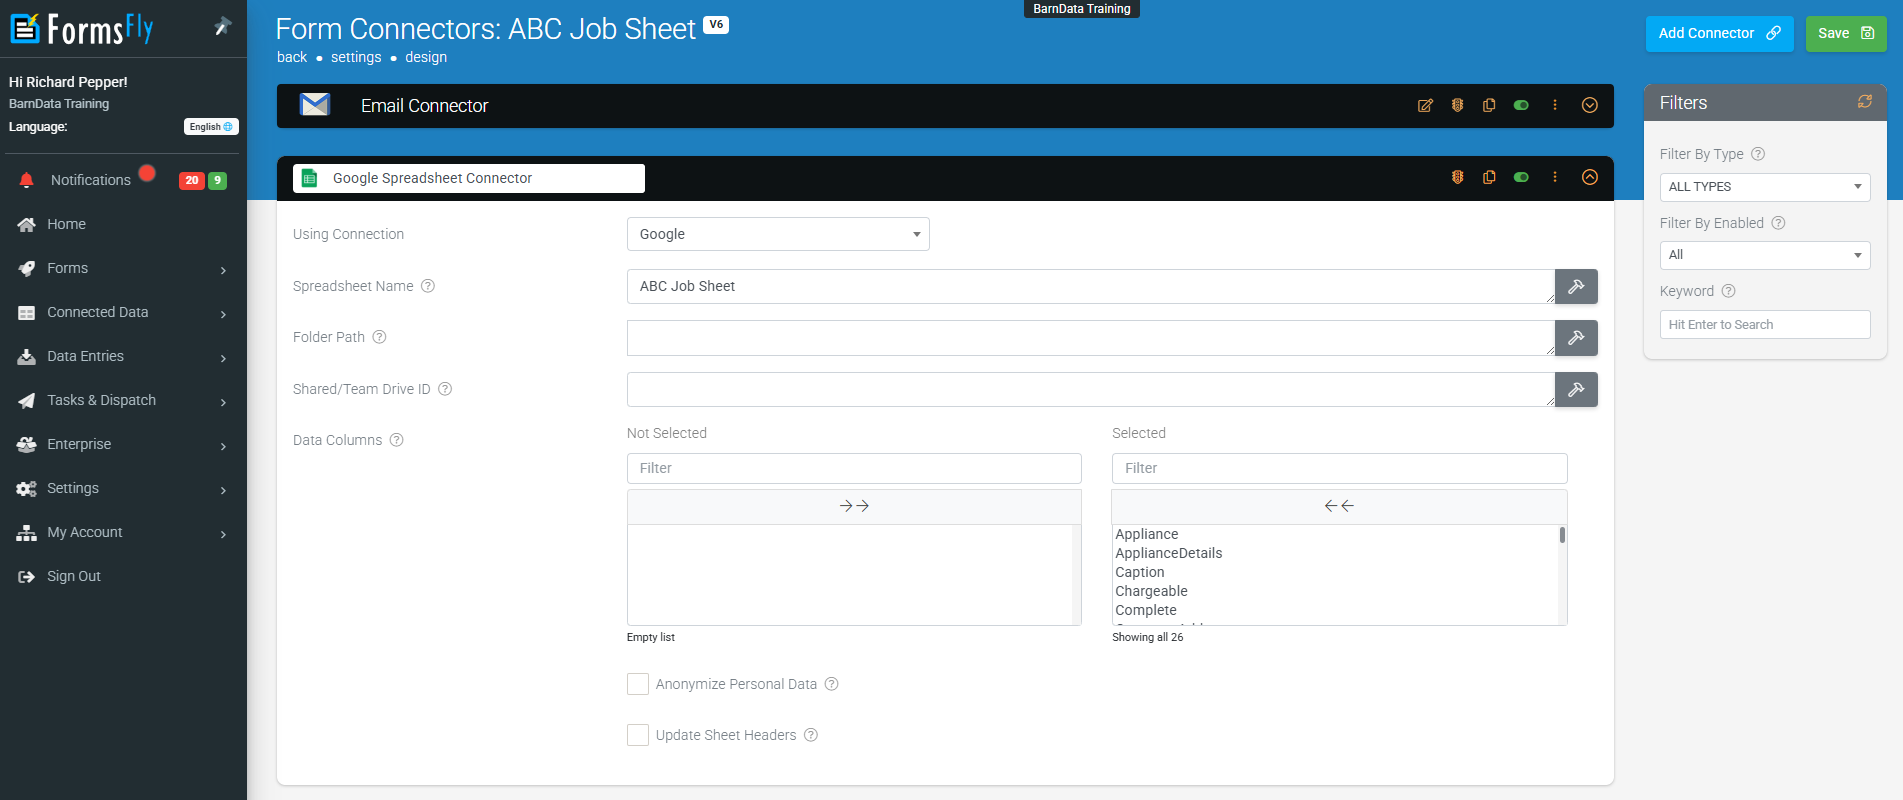
1. Using Connection
Select the Google connection (already configured)
2. Spreadsheet Name
Your spreadsheet will be created automatically on the first entry.
Make sure you have a valid Google Connection set up in the Connections page (My Account > Connections)
3. Folder Path:
Optionally enter a subfolder path, relative to your chosen Root Folder, for the exported file to be placed in. Path should be entered in the following format:
| ‘FolderName/AnotherFolder/FileGoesInThisOne’ |
4. Shared/Team Drive
If your target file location is within a Shared or Team Drive, you must specify the unique identifier for this Drive.
To retrieve the ID, go to your Google Drive in a web browser and navigate to the root of the target Drive.
Next, check the address bar of your web browser and copy the characters which follow the '/folders/' part of the URL.
| e.g. if the URL is |
| https://drive.google.com/drive/folders/1234567890ABCDEFGHI |
| then the drive ID of 1234567890ABCDEFGHI. |
5. Data Columns
Defined which form fields to populate as row values in your target dataset.
Upon your first Form entry, each selected Form field will auto-create a column of the same name if it does not already exist.
6. Anonymize Personal Data
If enabled, data from fields marked as Personal Data will be converted to a non-human-readable format to aid privacy.
7. Update Sheet Headers
If enabled, the Google Sheet headers will be updated each time the connector is processed
Add a Run Condition
Sometimes, you may have a Connector you only want to fire if the Form entry has a given answer value.
For example, you may have an Audit Form with a risk rating question with options like “Low,” “Medium,” and “High.” If the user answers the risk rating as “High,” you want to email a supervisor for follow-up and action.
This is where a Run Condition comes in.
Run Conditions are defined by creating a true/false formula.
The Connector will only run if the formula you define in the Run Condition has a true result.
So, in the example above, the Run Condition formula would be something like this:
{{RiskRating}} = 'High'When you hover over the Run Condition field, you will see a hammer icon appear.
Clicking the hammer will take you to the Formula Builder, where you can create a formula as desired.
See the Google Connection page to learn more about form formulae.