
Form Settings
Settings range from Basic Settings, like the screen’s title and how long the device keeps submitted entries in history, to Advanced Options for custom output templates, enabling editing of completed entries in-app and App Printing.
This includes information on any linked data sources from designing and the folders associated with the screen. A version and change history log is also available, providing insight into the form’s status and any changes made by whom and when.
Navigate to Apps > Screens and click the gear icon on the desired screen.

Also, the Settings option is available under a page’s title when viewing the Form’s Designer or Connector’s page for swift navigation when designing or adding connectors to push data out of the platform.
In this article
Options
Our platform provides a simple versioning and publishing approach to managing your screens. After creating a new screen, its state will be in “Draft/Test Mode,” and only assigned test users can view it.
After publishing, the screen will be available to all users unless stricter access rules have been applied to a Folder. Folders are useful tools for managing and distributing screens to your users.
If the screen is associated with a folder, specific users or groups can be assigned to access the folder’s content in-app.
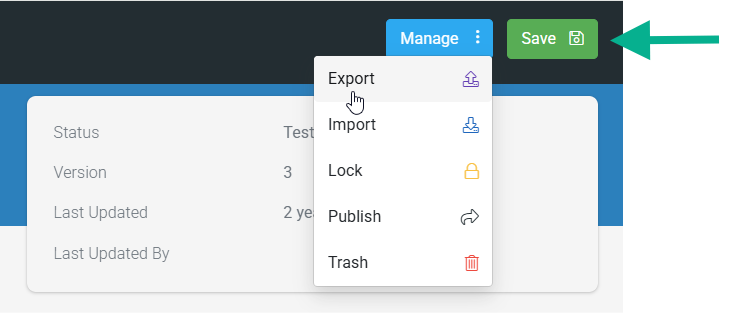
However, the screen’s options to Export, Save, etc, are explained in the table below.
These options display depending on the screen’s state, e.g., Published/Draft or Archived, with some present on the Form’s Designer and Connectors page.
 | Download an Excel (.XLSX) file of the screen that can be used to make bulk alterations or simply to save a copy locally. |
 | Import an Excel (.XLSX) or Comma Separated Values (.CSV) file in the required format. A downloadable template in the required format is available after clicking Import. |
 | Locks the screen, preventing multiple users from editing it. Locked screens can only be unlocked by the user who locked it or an Administrator. Only screens in Test/Draft mode can be locked. Published or Archived screens cannot be locked. |
 | Publishes a new screen version, and mobile apps automatically download this new version. |
 | Creates a new draft version of the screen.Draft versions are not visible to the mobile app until published unless test users are assigned. Note that users will still have access to the previously published version except for assigned test users. |
 | Archives the screen and automatically removes it from the mobile app. |
 | The screen and all associated data and versions will be moved to Trash and will no longer be available for use unless the screen is in Test Mode, in which case only the current test version will be moved to Trash. You will have 30 days to restore from the Trash area before the item(s) are permanently deleted from the system. Any screen deleted through the Apps > Screens page by clicking on the checkbox next to it will have all Test/Published versions of that screen put into Trash. |
 | Saves any changes made. Users can then sync the app to see saved changes. |
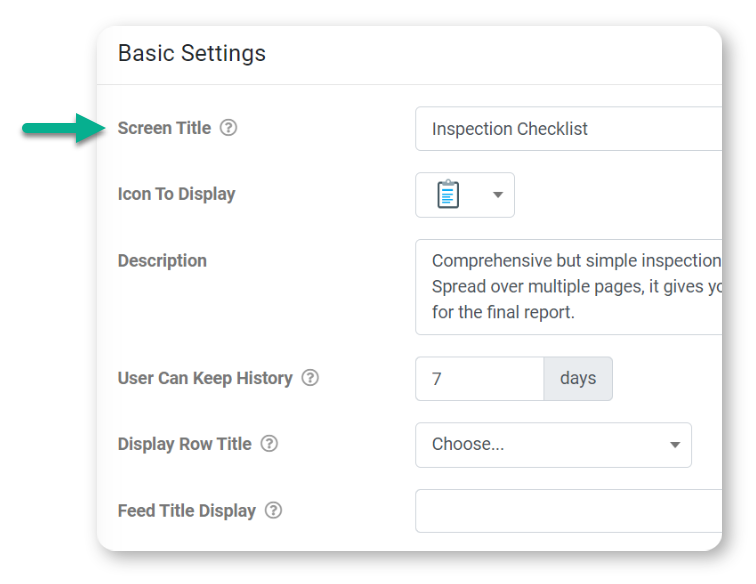
Basic Settings
| Property | Description |
| Screen Title | The screen’s title displayed in the web portal and in-app (e.g., in the title bar). If you wish to categorize this Screen by a code or other external identifier, see the External ID option. |
| Icon To Display | Select the icon that displays in-app. |
| Description | Enter a description of the Screen’s purpose/functionality. |
| User Can Keep History | The number of days that data entries for this Form will remain on the user’s device in a read-only state. A value of zero means that no history will be stored. In-app, users can search previously submitted entries to find specific entries. |
| Display Row Title | If set, then the answer of the chosen Form field is displayed as the row title in the History and Saved Entries listing screens of the app. |
| Feed Title Display | Use our standard Data Template syntax to dynamically include field values and formula results in the form title upon submission, ensuring a more distinct and recognizable identifier for Data Entries in the Data Feed. e.g. Inspection Checklist – {{inspection_date}} – {{building_name}} In the example above, the form submission will have a unique title in the feed view display showing the inspection date {{inspection_date}} and the name of the building that the inspection was done on {{building_name}} e.g. Safety Inspection – {{inspection_date}} – {( IF({{success_YN}} =’Yes’, ‘U2713’, ‘U274C’) )} In the example above, the feed title for the form submission will show a special Unicode character, a tick (✓) if the value of {{success_YN}} is ‘Yes’ or a cross (x) if the answer is ‘No’. |
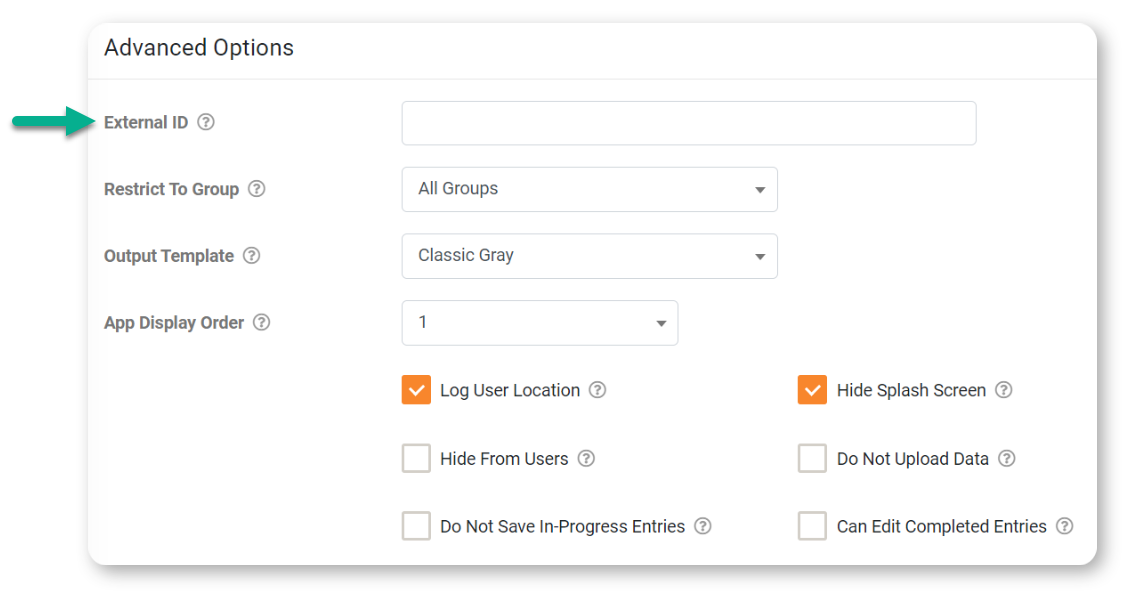
Advanced Options
| Property | Description |
| External ID | Optional field that lets you link/track this Screen against a similar entity in an external system. Required if you are using the API. |
| Restrict To Group | Restrict access to a specific User Group. |
| Output Template | Select the default template you wish to use when outputting data from this Form.
|
| App Display Order | Controls where this screen icon will display on the default start screen of your app. Icons are ordered from 1 upwards, and ties are ordered alphabetically. |
| Log User Location | Whether or not the user’s current GPS location (as at filling out the form) should be logged automatically. The location is returned in the “Completed At” column of the resulting data entry in the Data area. |
| Hide From User | Prevents this item from being displayed on the default start screen. Useful when this item should only be opened by a User Interaction (e.g., from an icon on an Icon Board screen) |
| Do Not Save In-Progress Entries | By default, the app automatically saves the progress of Form entries and prompts the user to save or discard changes if they exit the Form prior to uploading. This option disables all in-progress saving and removes the save/discard changes user prompt. Good for scenarios where the Form is purely for navigation purposes or for ‘use it or lose it’ cases where Form entries must be captured and submitted immediately. |
| Hide Splash Screen | Hides the title splash screen for this Form, going directly to the first page. |
| Do Not Upload Data | Prevents this Form from uploading data entries to the server. Used for Forms that edit Global Values or for cases where data captured is to be stored on the device only. |
| Can Edit Completed Entries | Allows app users to edit and update completed form entries. Editing is available from the entry history page and OpenEntry interaction on the app. Once the Form Entry Update is applied to the platform, all connectors and data source bindings will be reprocessed. |
App Printing
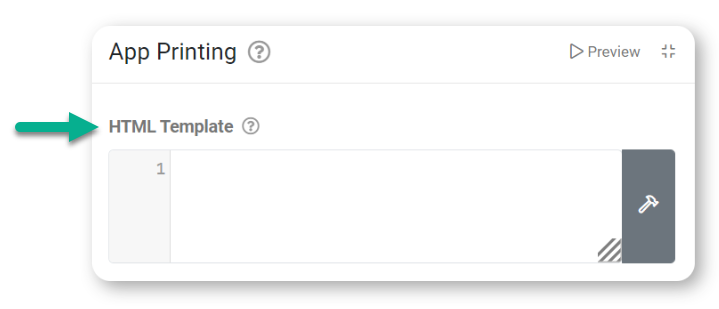
Generate and print completed Form entries from an HTML template directly on the app, even while offline.
Use our standard Data Template syntax in your HTML to inject Form entry answers and other dynamic values.
You can review the template via the Preview button provided. This will generate an output using an existing Form entry for this Form screen version.
If no entry exists, all Form entry values in the HTML template will be blank in the preview.
Form entries can be printed in the following ways:
- Via the ‘Upload and Print’ button that automatically appears on the app submission page of a Form that has an HTML template defined
- The ‘Print’ button is available when reviewing a completed Form entry in the app History area
- From the ‘Upload Form and Print’ user interaction available on the Action Field type buttons
- Through the ‘Print Form Entry’ interaction option available on most Screen types