
More Data Types
In this article
Choices Field
In our imaginary scenario, we have three Job Types: “Sales Visit”, “Service Visit” and “Other”.
A good type of Question to use for this would be a Choices field. A choices field can present multi-choice options.
Let’s add one to our form, so select the 
The new question field will be added underneath the "Customer Name" field.
Now you can click on the new field so that we can adjust its parameters. We’ll give it a Data Name of “JobType” and a Title Text of “Type”.
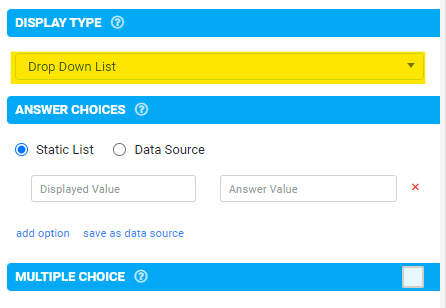
Because this is a Choices field, it has some different parameters.
A Choices field is very flexible. It can operate in one of three ways.
- A Drop Down List is just what it says. Your choices will be displayed in a dropdown and the user will be able to select one by dropping down the list and then clicking the one they want.
- A List of Choices will display each of your choices on the mobile device, with a tick box next to each one. The user can select a choice by ticking the tick box. This can work well, if the number of options is small.
- An Auto-Complete Search provides a text box into which the user can type part of what they are looking for. The options are then narrowed to the ones that match, and displayed as if it were a “List of Choices”. For instance, if we typed “h71” into the Product Code field, it would show all the products beginning with “h71” and the user would select one by ticking it. This can work well where the number of options is large.
We tell FormsFly which one of the above to use for our Choices field by adjusting the Display Type parameter. Let’s use the “List of Choices” option.
Importantly, we must now give FormsFly the list of options to display!
In this case, we have a “static list” of options that we can type in. That just means that we’re going to define the list of possible options in a fixed list. You will see that one row is provided already for you to enter an option. But we have three options, so you will need to click on the “Add Option” link twice, to get us two more blank rows. We can then fill them in like this:
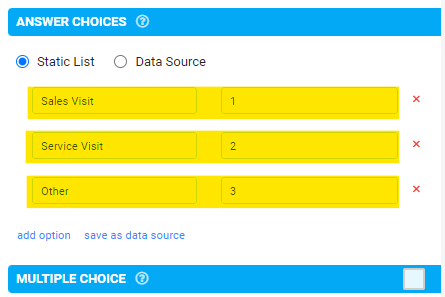
So, if the user selects “Service Visit”, then FormsFly will store the value “2” in the JobType field.
Media Field
Now we’re going to add the facility for the user to take a photo of the job and include it with the Job Sheet. We do this using a Media field. Actually a Media field can contain a Photo, a Video clip or an audio clip, but the default setting is photo.
We’re going to put the Photo onto a separate page in our form, to make things less cluttered. So first let’s add the second page. Use the 
When you click that button, the second page is created and we switch to that page (page2), which means that all your page1 fields will vanish. Don’t panic! You can now switch between page 1 and page 2 by using the page selector at the bottom of the screen.

So, make sure you are on the new blank page2. Then we can add the Media field by clicking the 
Now we will adjust the properties of this new field as usual.
You’re getting the hang of this now, aren’t you?
Set the Data Name to “Photo” and the Title Text to “Optional Photo”.
By default, photos in FormsFly can either come from the existing photos stored on the mobile device, or they can be a new photo, captured there and then on the device.
If it’s important to you that the photos on your forms must be taken there and then at form completion time, then you can tick the check box labelled “Capture Only”. This might be useful if you need to be 100% sure that the photo accurately represents the state of affairs at the time of form submission.
Signature Field
Lastly for this session, we are going to add a Signature field. This allows your mobile users to capture a handwritten signature (e.g. client sign-off etc).
So, use the 
Give it a Data Name of “Signature” and a Title Text of “Customer Signature”.
Save and Publish your form to make it visible in the FormsFly app on your mobile device.
Try out this new “version 2” of your form, and marvel at your handiwork!