
Workflow A Form Entry Between Users (Process Steps)
The Process Step field type found in the Form Designer enables these kinds of workflow cases, and mastering this field unlocks a host of mobile process options.
You can think of Process Step fields as "gates" between the various steps of your overall process as represented in a single Form's pages. Each time a user hits a Form page containing an incomplete Process Step, they cannot proceed to any Pages further in the Form - i.e., the Process Step will hide the rest of the Form away from them, acting like a "gate".
In this article
| This article references our Examples Catalog > General > Asset Check Process app that can be installed into your account. |
Asset Check Process Example
The Asset Check Process example assumes the following business process:
- A field worker goes out to physically inspect key machinery assets.
- The logs of this checkup need to be reviewed by a supervisor to ensure all required aspects have been correctly captured.
- If the supervisor finds a capturing error or needs more detail, they will reject the checkup and send it back to the original field worker for rectification.
- Otherwise, they approve the checkup logs and sign it off.
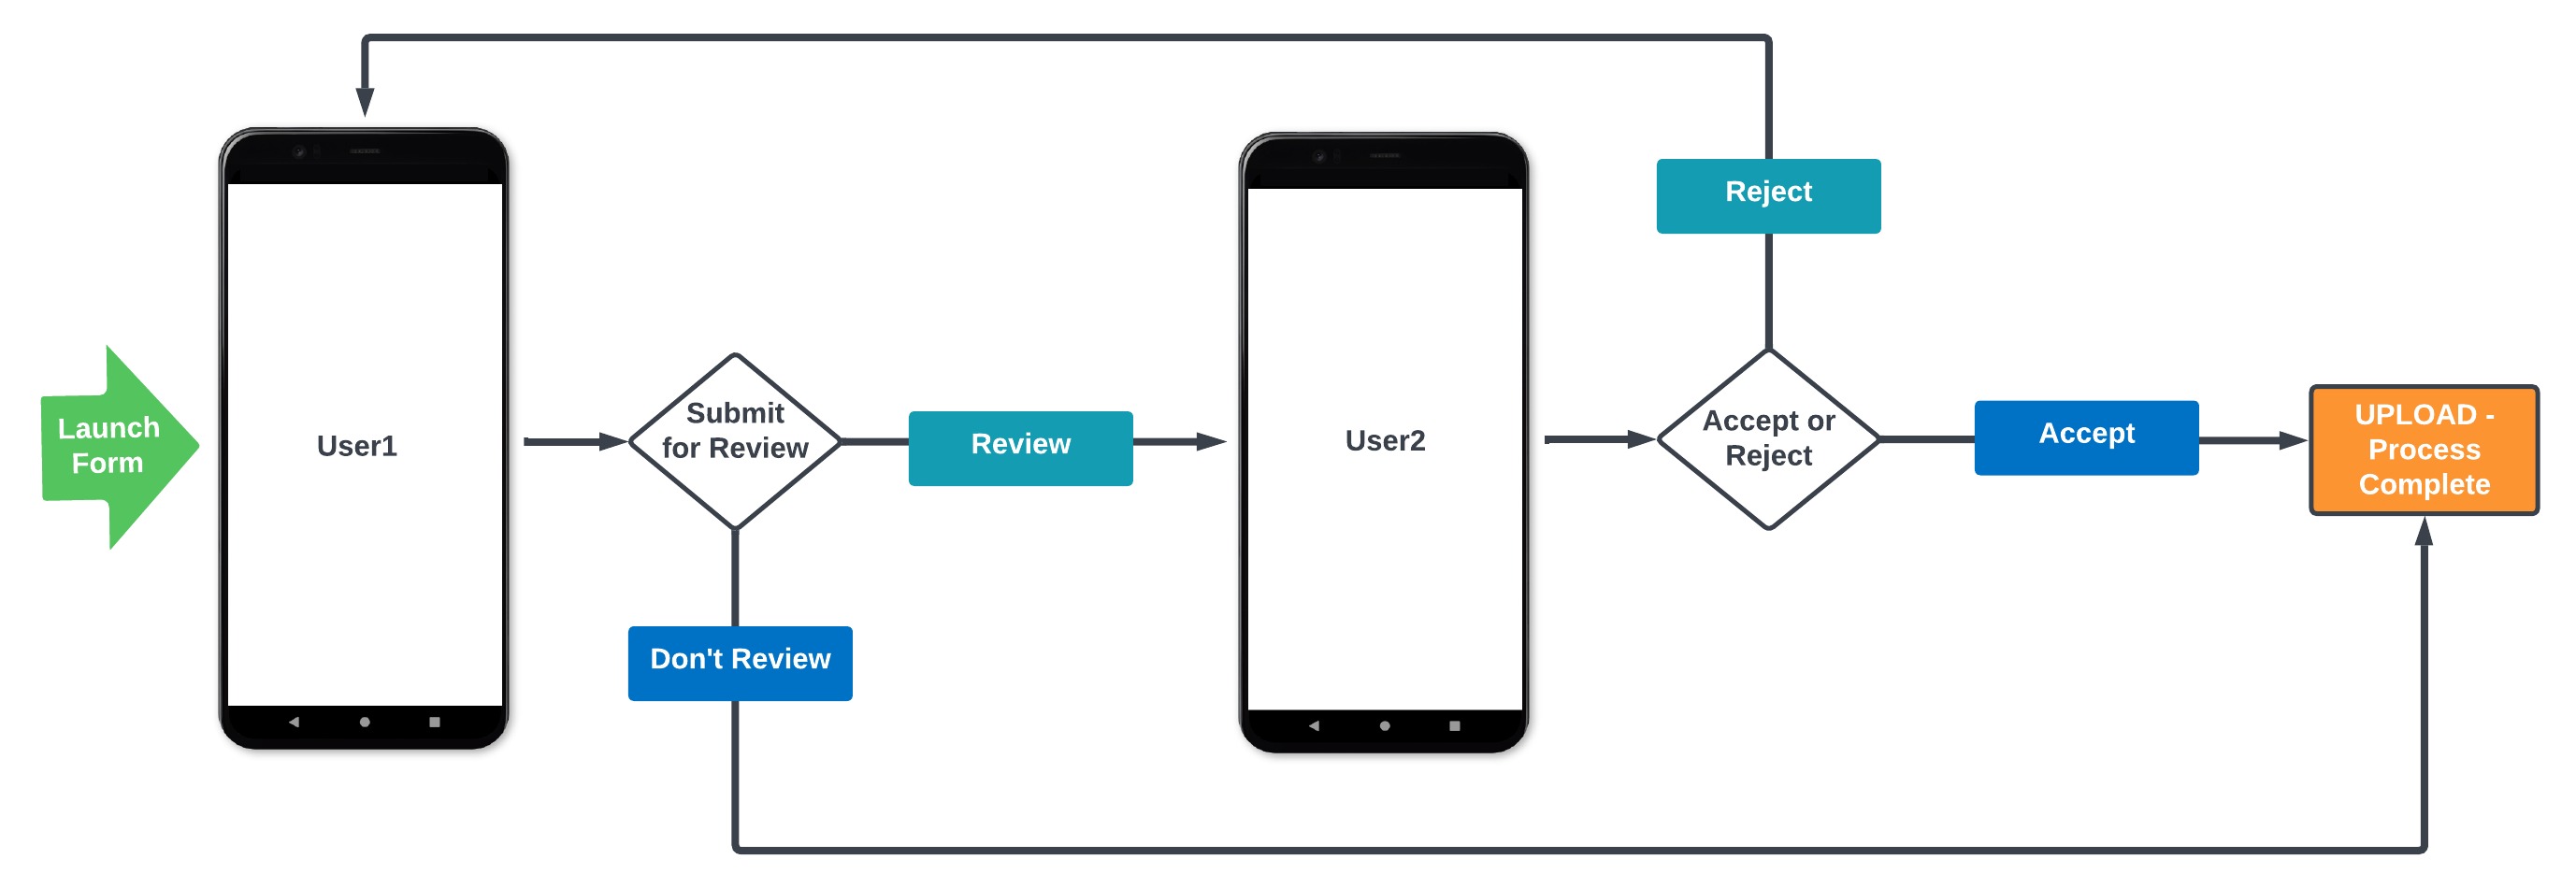
This scenario involves two key steps in the process:
- The field worker submitted the check log for review (User1)
- The supervisor accepting or rejecting the log (User2)
We can represent this in a high-level Form flow as follows:
field worker page(s) | supervisor page(s) | end form or go back to the field worker. The "|" will be where our Process Step fields are placed.
The field worker page(s) will have a Process Step field on the final page in that set, and the supervisor page(s) will similarly end with a Process Step.
Let's get into the example.
| 1. | Open the Asset Check Process design in the Form Designer. You will see the "Confirm ready to review" Process Step field (dataname: step1). | |||
Note also the fields named "Send to Reviewer" (dataname: reviewTo) and "Any comments..." (dataname: reviewComments): 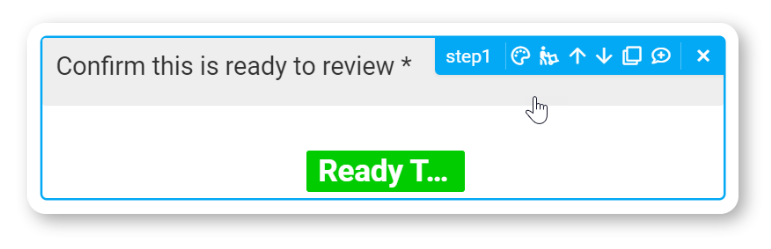 | ||||
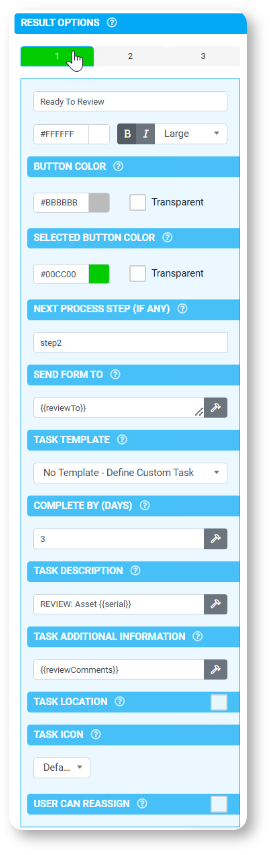
| 2. | Click on the "Confirm Ready" field to view the field's properties on the right-hand side. | |||
| Here's what the app will do when the field worker user hits this Process Step in the Form: | ||||
 |
| |||
| d. | When the form is uploaded, the platform will see a "Next Process Step" configured to go to step2. This triggers the platform to create and send a Task to the supervisor user identified by the email address in the "Send Form To" property. In our case, the email address of the target supervisor user is retrieved from the ReviewTo choices field seen earlier. | |||
| e. | The Task created will have the title set out by the "Task Description" property. You can embed values from other form fields into the Task title using our standard {{dataname}} syntax. | |||
| f. | The Task will have a due date automatically set according to the current date/time + the number of days set in the "Complete By" property. | |||
| g. | The Task's additional information field will contain any text the user enters into the reviewComments text field. | |||
| 3. | Once the step1 field is complete, the reviewTo field is hidden due to its formula - which requires that the current Step be the step1 field. | |||
The reviewComments field will display only once the user taps the step1 field and thereafter - i.e., once the step1 field has a value. 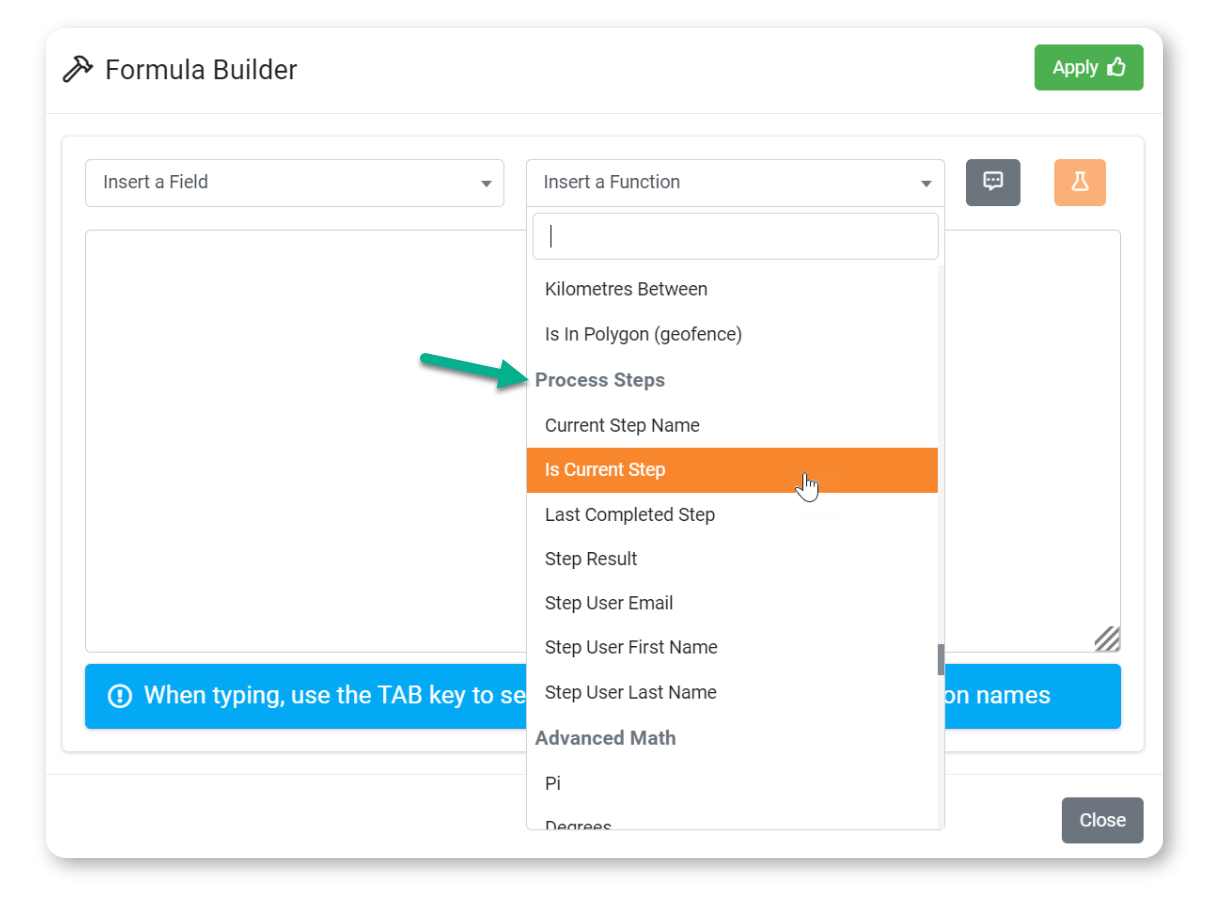 | ||||
| 4. | Now, head to the second page (dataname: reviewPg) in the Asset Check Process design. | |||
| You should see a Process Step field titled "Approve or Reject this Check?" (dataname: step2) and rejectReason and acceptSign fields below. | ||||
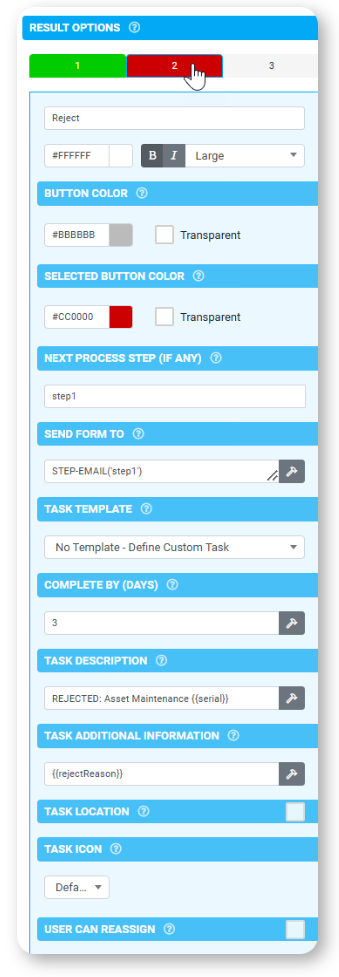
| 5. | Click on the "Approve or Reject" field and look at its properties on the right-hand side. | |||
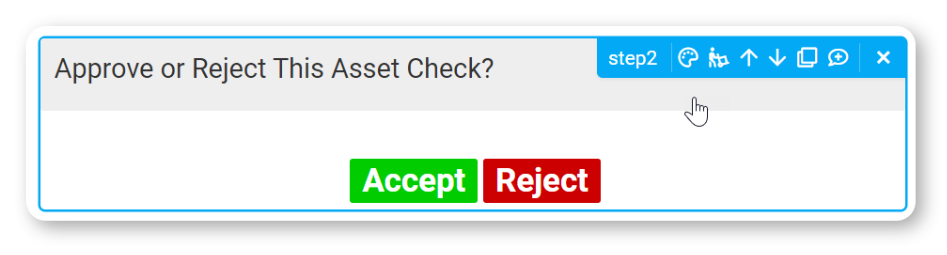 Click on result 1 (the green button) and then on result 2 (the red button) and notice the differences in property values between the result options. | ||||
 |
| |||
| d. | The acceptSign field will display if the supervisor selects the "Approve" button in the app. This is due to the acceptSign field in the Form design having a Visibility formula that hides the field unless the step2 field is set to a value of "Approve" (which occurs if the supervisor selects the "Approve" result). | |||
| e. | If the supervisor chooses "Reject", they can continue to the "Upload Form" page. | |||
| f. | The rejectReason field will display if the supervisor selects the "Reject" button on the app. Similarly to the acceptSign field, this is driven by the Visibility formula assigned to the rejectReason field. | |||
| g. | On upload, the form entry will be sent back as a Task to the original field worker who completed step1. This is driven by the step2's Result 2 option - the "Reject" case. We can see that the "Send Form To" property uses the STEP-EMAIL() formula to extract the user's email address who completed step1. | |||
| h. | The reject Task will have a title and additional information configured in the step2 properties. Additionally, the step1 field on the form entry will be unlocked/reset to an incomplete status. So, when the field worker opens the reject Task and enters the Form entry, the incomplete step1 will gate them back to the first page. | |||
Whew, That's a lot to take in!
At this stage, hopefully, you have a better idea of how to use Process Steps, and with luck, some cool possibilities are now starting to form in your imagination :-)
Your next action should be to try out the Asset Check Process example for yourself.
Run the form on your device and send the review to yourself.
Before you do so, make sure that you update the "Users Example" data source that is attached to the reviewTo choices field.
You need to add your own user email address to the data source so that you can select yourself from the choices field displayed under "Send Review To" on the app ;-)
When you build your own processes in a Form, start with just a single Process Step first. Then, you can add more Steps progressively, making testing easier.
Tips & Tricks
How to make previously entered step fields read-only
With Process Steps, we don't apply any edit prevention by default. However, you can set this up as desired by defining Read Only Conditions on the relevant fields.
So, for example, if a field is not allowed to be edited AFTER completing a Process Step named "step1", then you would set the Read Only Condition on the field to be:
ISBLANK(STEP-CURRENT()) OR NOT(STEP-CURRENT() = 'step1')
The ISBLANK() piece above caters to the situation where no steps have been completed yet - e.g., this is the initial creation/entry of the Form.
If the target field's editable state relates to a step beyond the first in your Form design, then the ISBLANK() is unnecessary.
Running Form Connectors only on specific steps in your process
- A current Step will be considered complete as soon as the app user uploads the Form entry.
As such, the current step will always be completed BEFORE the connectors run.
- Any connectors you want to run on specific Steps should have a "run condition" added.
You do this via the "Add Run Condition" option on most Form connectors.
- We recommend using STEP-COMPLETED() in your condition formula, though you can also use STEP-CURRENT() or STEP-ISCURRENT().
The CURRENT formula functions will require you to specify the next step's name for accurate results.
e.g., Only run Connector when "Step 1" is completed (and the process has moved to "Step2"):
STEP-COMPLETED() = 'Step1'
or
STEP-CURRENT() = 'Step2'
or
STEP-ISCURRENT('Step2')
How to skip process steps in-app
One of the features of our Screen Title Bar is that you can configure your app to display tabs for each page in your app, which can be useful for providing easier navigation on multi-page forms.
As soon as you select "Display Pages as Tabs", you will be able to set the option to "Only Display Tabs to Current Step".
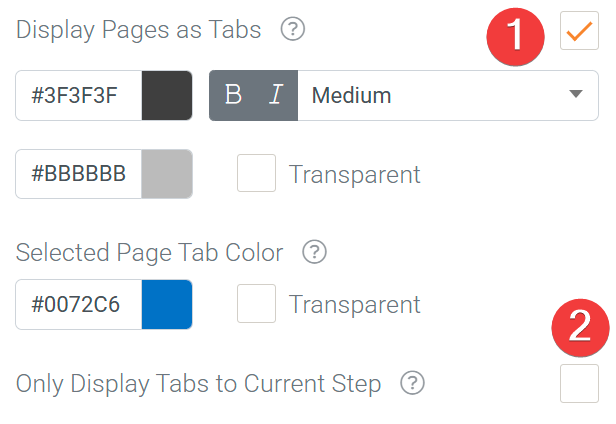
If the "Only Display Tabs to Current Step" option is enabled, then only tabs up to the page containing the current process step will be displayed.
If the option to "Only Display Tabs to Current Step" is NOT selected, then that means that tabs for all pages will be shown regardless of the current process step and, in this way, users will be able to skip process steps.