
Adding a Power BI Connection

This connector allows you to send data directly from our platform to Power BI for further analysis and display.
Note: Azure AD is being renamed to Microsoft Entra ID.
Adding a Power BI Connection
When logged into your FormsFly web portal, navigate to Connected Data > Connections > Add Connection – Power BI.
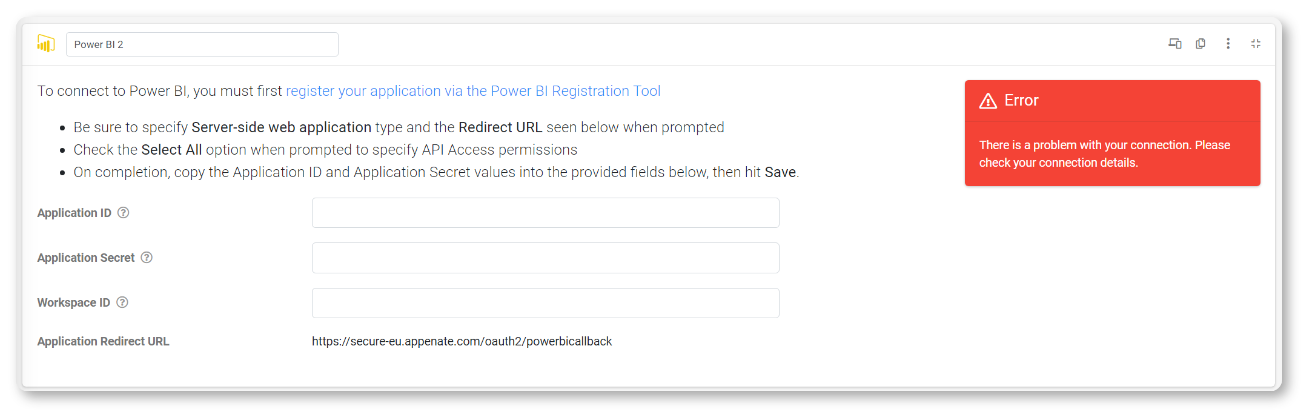
After registering your Power BI Application, you will have access to all the details necessary to configure the connection.
| Property | Description | Obtained? |
| Application ID | This identifies your Power BI application to Azure Active Directory. This value will be a GUID in the form: 3c8ae5a6-4869-41a9-af36-8517434d9cc0 | via Azure portal |
| Application Secret | This secures your Power BI application with Azure Active Directory. This value is NOT a GUID and will be in the form of: obH8P~yMaQYvxv-JZDKUIv.N9XVe3Kc_l8Z5OaYF | via Azure portal |
| Workspace ID | Add an ID for your custom PowerBI workspace. Leave blank to use the default My Workspace. Note: This can be obtained via URL in the browser when viewing workspace. | obtained from Power BI Dashboard URL |
| Application Redirect URL (Redirect URI on Azure portal) | https://secure-eu.formsfly.com/oauth2/powerbicallback | used in Azure portal |
Once you’ve followed the setup guide, created your app, and set your API permissions, you’ll be able to fill out all the fields associated with the Connection’s properties and then hit SAVE to view the Authorize button.
| Clicking the Authorize button will authorize the use of the currently signed-in Microsoft account. If you prefer to use a different account, you can either log out of all currently signed-in accounts and then click this button again or you can open an incognito, private browsing window to sign in with your preferred account. |
Configuring Power BI API Permissions
By this point, your app should be configured on the Microsoft Azure portal. Now, you just need guidance on adding the correct permissions for Power BI so that you can authenticate correctly.
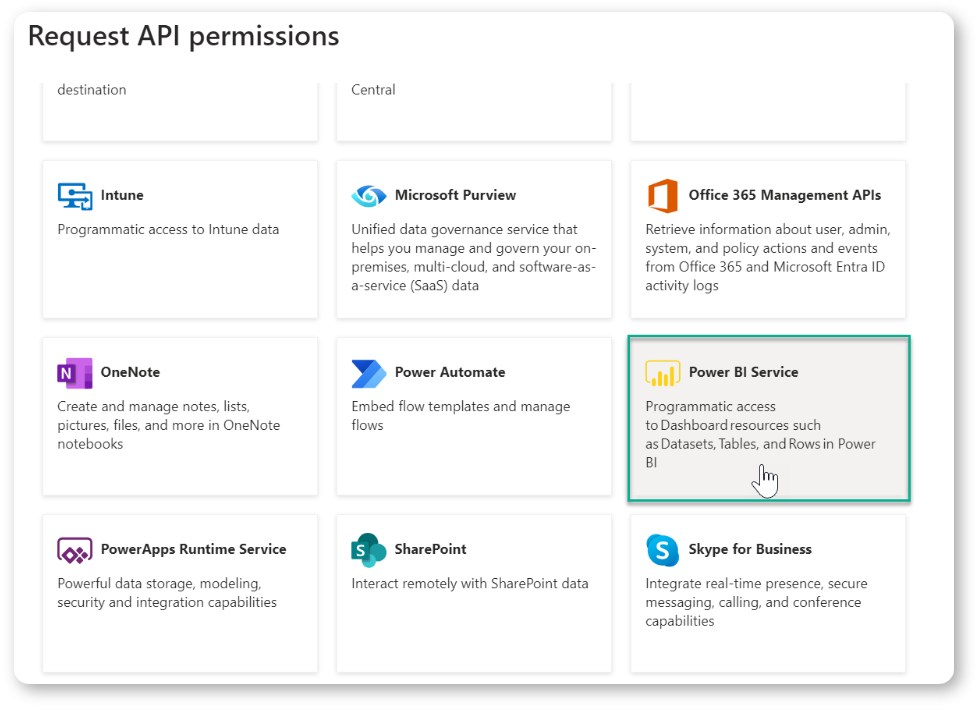
After selecting “Power BI Service” as the service for which you would like to configure API permissions, on the next screen, select “Delegated Permissions” as shown in the screenshot below:
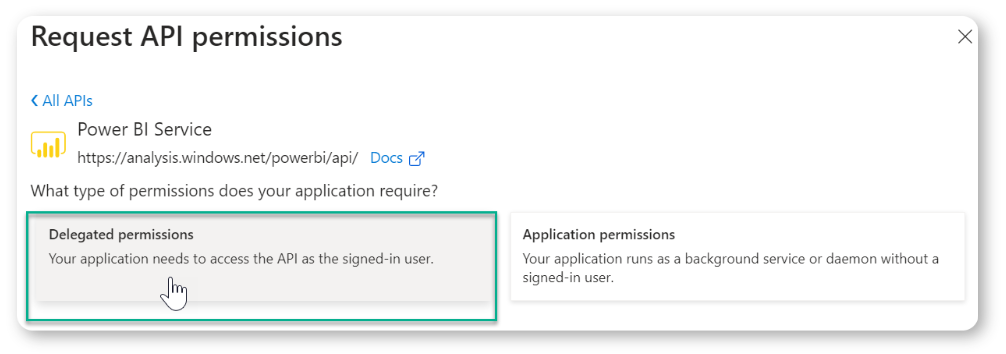
For your Power BI connection to work, you must add explicit support for the following API permissions on the “Delegated Permissions” screen.
| Power BI API Permission Requirements | ||
| API/Permission Name | Type | Description |
| Dataset.Read.Al | Delegated | View all datasets. |
| Dataset.ReadWrite.All | Delegated | Read and write all datasets. |
| User.Read | Delegated | Sign in and read the user profile. |
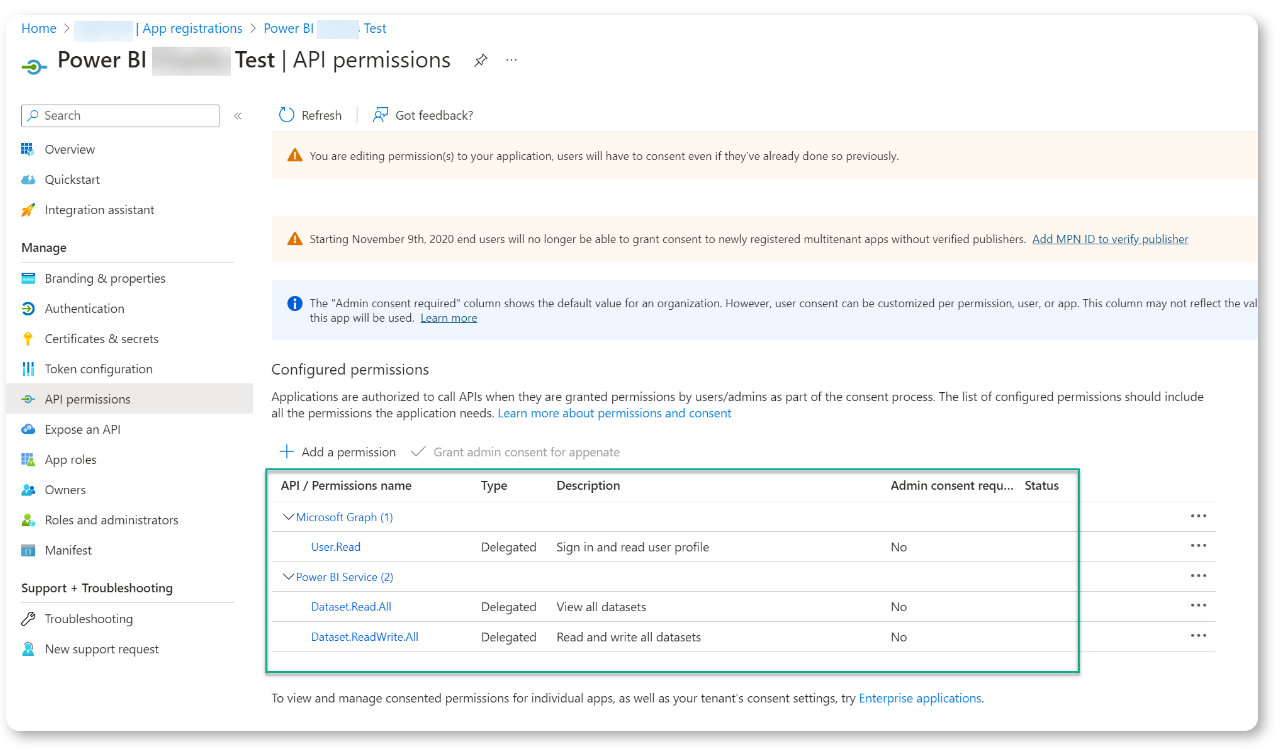
Your permissions are setup correctly if they look like the permissions in the screenshot below:
If you’ve completed all of the above successfully, then you are finally ready to authorize your connection on our platform.
Authorizing Connection
On our secure web portal, after entering your Client ID and Secret, hit Save and then Authorize. If you’ve done everything correctly, then after you authorize our platform to connect to your account, you should see the success indicator below:
