
Creating your First Form
Accessing the Examples Catalog
From the menu, select Forms > Sample Forms
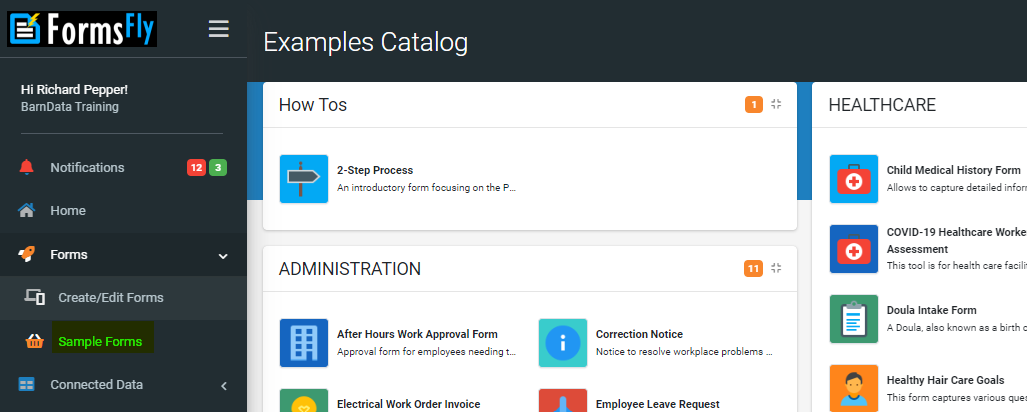
The example templates are organised by category/industry (Health & Safety, Construction, etc). The list is quite extensive but you can search by category at the top of the screen.
Installing an Example Form
To install one of the forms in your account, just click on it. A confirmation box appears, and you can then just click the 

The templates can work as a basis for your own forms, because you can modify them once installed.
Or you can just use them to look at – they demonstrate much of the functionality that we are going to talk about in this guide.
Of course, you don’t have to use the templates at all. If you prefer, you can simply create your own forms from scratch (see 'Route 2 - Create Your Own Form' below).
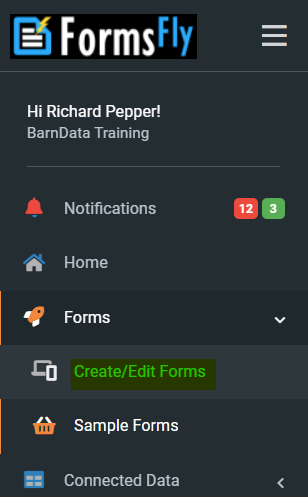
Adding Your Form
In FormsFly, the data entry forms that you create are just a special type of “Screen”. So, on the menu, select Forms > Create/Edit Forms
This will give a list of any screens already in your account. At the top right of the screen, click the 
The “Create New Screen” window will then appear. It looks like this:
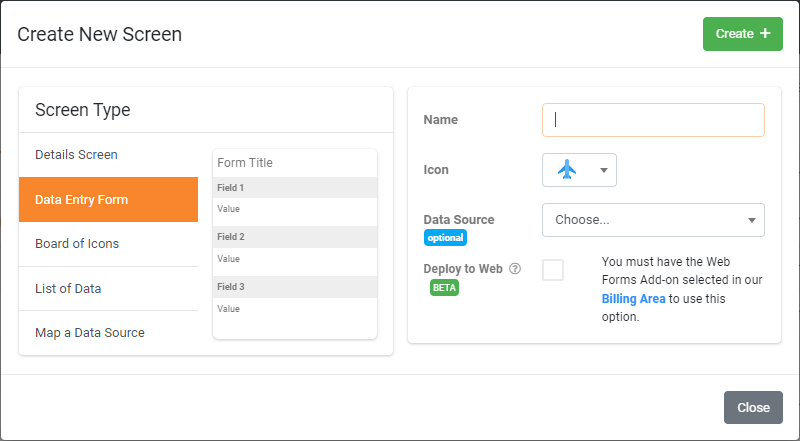
On the left you can choose what kind of screen you want to create. There are four options (more about that later) but, for now, we’re only interested in creating a straightforward Data Entry Form, which is the default, so you can leave it set the way it is.
Each form needs a unique name to identify it when the mobile users view it on their app. For instance, you might have a “Defect Form”, a “Product Form” and a “Supplier Form”, so you would need to give them meaningful names to avoid confusion.
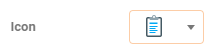
Let’s call our first form “Job Sheet”. If you like, you can use the dropdown list labelled “Icon to display” in order to change the icon your mobile users will see for this particular form. Let’s change this to the clipboard icon.
For simple forms, this is all you need to do, so click the 
For now, we don’t need a Data Source.
So, your screen should look something like the one above.
The new, blank “Job Sheet” form is opened up in design view for you. Now you need to tell FormsFly what questions you want on your form, and what kind of answers you are expecting.
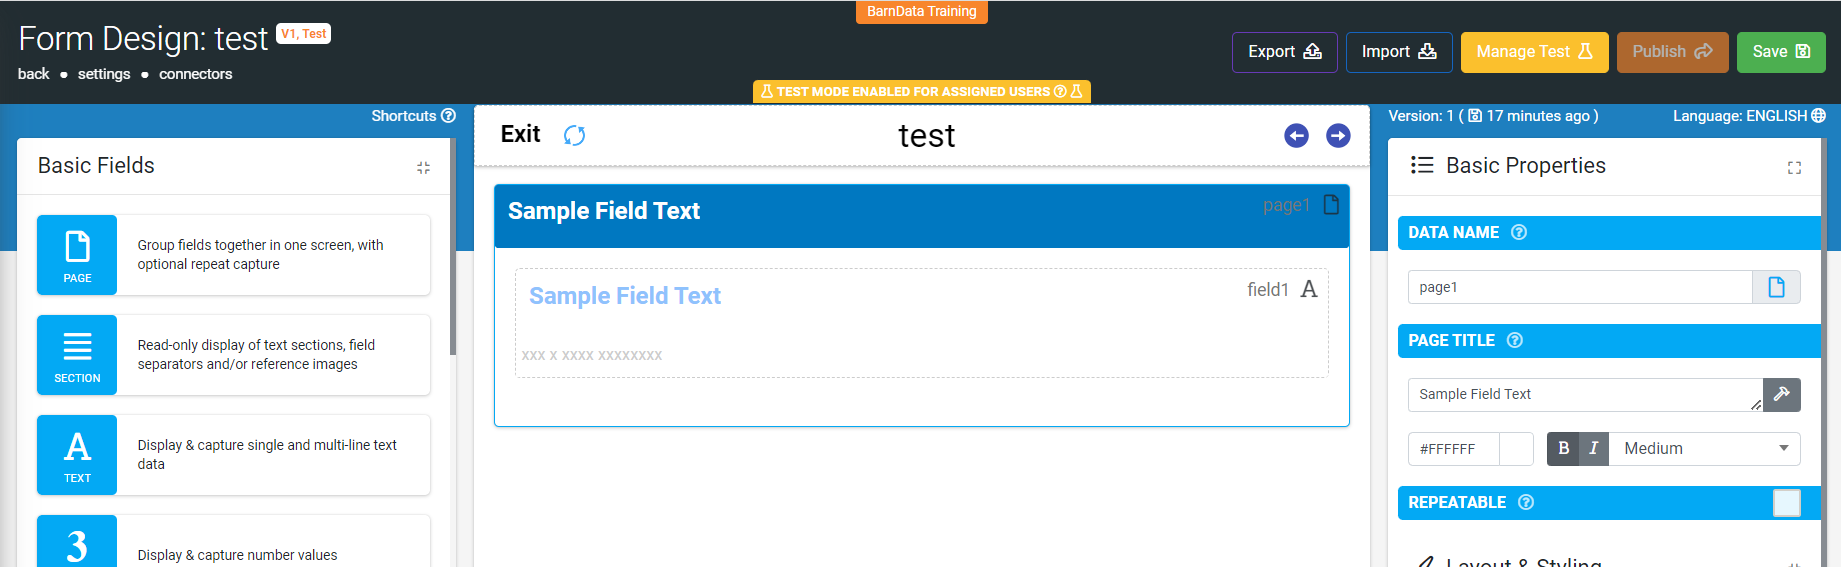
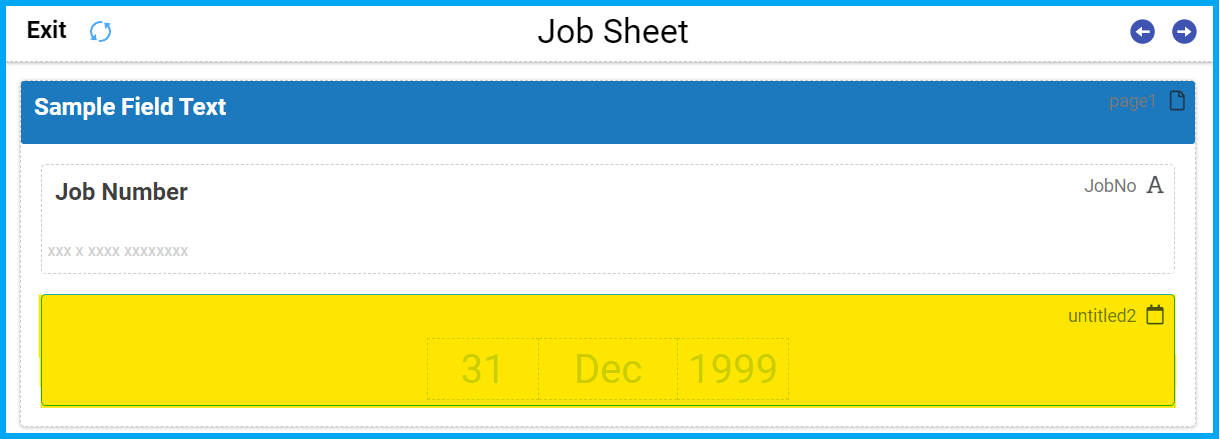
The system automatically adds a single page to your form (you can see it’s labelled “page1”), and on that page it automatically adds a single question (or "field"), labelled “Sample Field Text”.
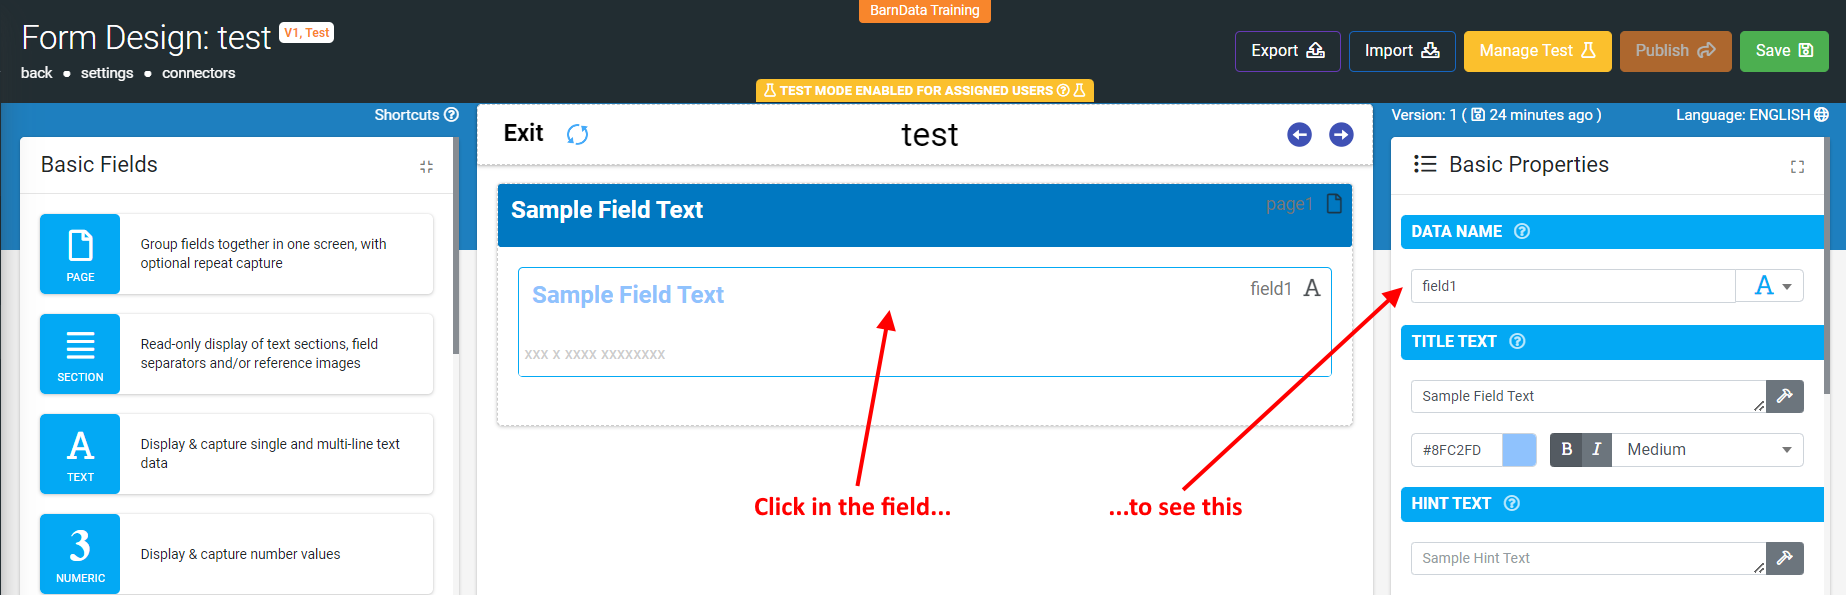
Click on the sample field - see image below - and some more information will appear on the right hand side of the screen. You are now looking at the details (“Properties”) for this Question.
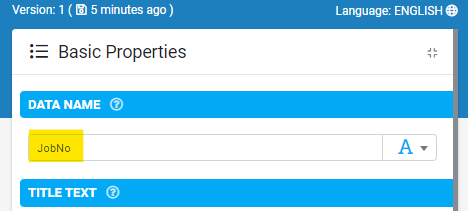
Let’s say that the first question we want on our demonstration Job Sheet form is a Job Number.
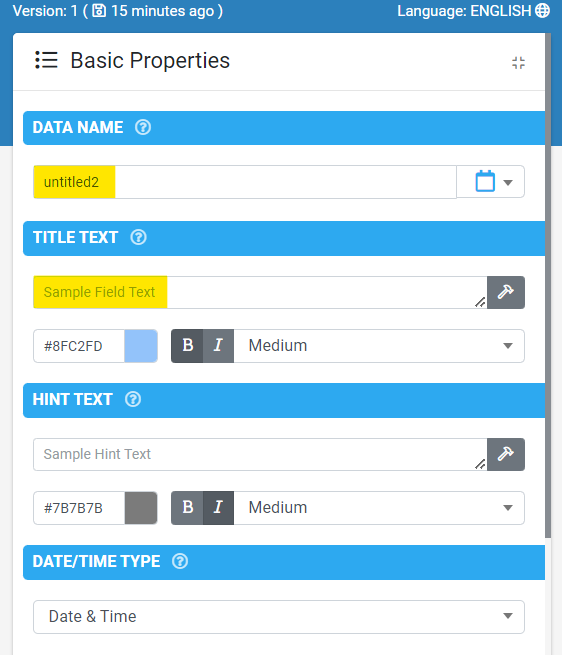
The Data Name (top right) is the unique name by which we’re going to refer to this question. Clearly, “field1” is not very meaningful. Data Names cannot contain spaces, so let’s change it to “JobNo”.
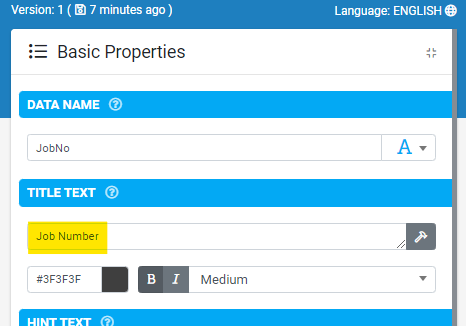
The next box, labelled Title Text, contains the actual question that the mobile user will see on their device. Once again, “Sample Field Text” would not be a good prompt, so we will change it to “Job Number” (or you could use “Job No” if you prefer).
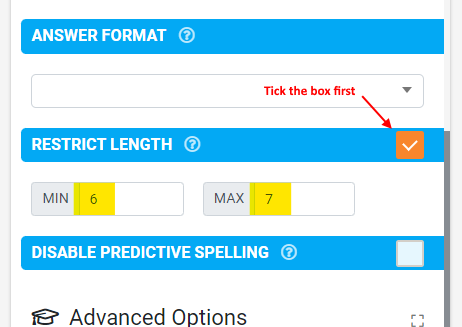
In our example company, let’s say that Job Numbers consist of a letter “J” followed by 5 or 6 digits (eg “J12345”, “J313131” would both be valid). That means a Job Number must be can never be less than 6 characters, nor more than 7 characters long. So let’s tell FormsFly that, and it can help us by validating the Job Numbers for length as they are entered.
We will use the Restrict Length tickbox and the Minimum and Maximum boxes. You’ll need to scroll down a bit for that:
There are other things we could do using these field “Field Properties” panel on the right hand part of the screen, but let’s keep things simple for now.
We’d better add a Job Date, though. To add a Question to the form, you use the buttons down the left hand side. Each button adds a different type of field. Some of the most common include:
Text Field. This type of Question allows the user to enter any kind of text data in their response, just as in the sample field we just amended. Text Fields are great for Customer Names, Product Descriptions, Addresses, as well as for most kinds of Codes (eg Product IDs, Customer Codes, Staff Numbers etc). They would also be used to store an email address, or a telephone number.
|

|
Numeric Field. As a rule of thumb, you might use this for any kind of number where it might be feasible to do calculations on the result. For instance, Order Quantity, Product Price, Hours Onsite, Item Length, etc.
|

|
Date/Time Field. This type of question will present the mobile user with a special date/time selector, from which they can choose a date (and/or a time).
|

|
So, to add our Job Date to the form, click on the Date/Time Field button. You will see the new field below the Job Number.
To indicate what it might look like, the system shows the date here as 31 Dec 9999 but don’t worry, on the mobile screen, this will be a proper date field!
Click on the new date field to call up its properties. They should look something like the example shown below.
So, you might like to change the Data Name to “JobDate” and the Title Text (the text that the user will see) to “Job Date”.
That was much the same as what we did with the Text Field for Job Number. But, because this is a Date/Time field, we also have different parameters available to us.
For instance, further down you will find a dropdown list labelled Date/Time Type. You can set this to “Date/Time” (the default) or to “Date Only” or to “Time Only”. You decide which you would like for your Job Date.
The last Question we are going to add to our simple Job Sheet (for now) is a Customer Name.
This Question will be another Text Field, so use the button:

to add the new field to the form, then modify its Data Name to “CustName” and its Title Text to “Customer Name”.
If you need to go back and amend the properties for one of the other questions on your form, just click on the question to select it. The properties will change to reflect the currently selected question.