
Using Data Sources to Lookup Data
In this latest version of your form, we used a Choices field to capture the Job Type. That was easy because there were just a few, fixed options. But what if you want to include a dropdown list of all your products, for instance? You’d want to be able to upload those to FormsFly and, as your product catalogue changes, you’d want to be able to re-upload it at some later stage.
For our Job Sheet example, we’re going to replace the “CustName” Text field we used on page1 of our form with a dropdown list. That way, instead of typing the customer name in full, the mobile user will be able to just select the customer from the list.
We’ll start by creating our customer Data Source, ready for use in the dropdown.
To do that, click the menu option Connected Data > Data Sources.
Now click 
Don’t worry about any of the other questions on this screen – you can leave them as they are for now.
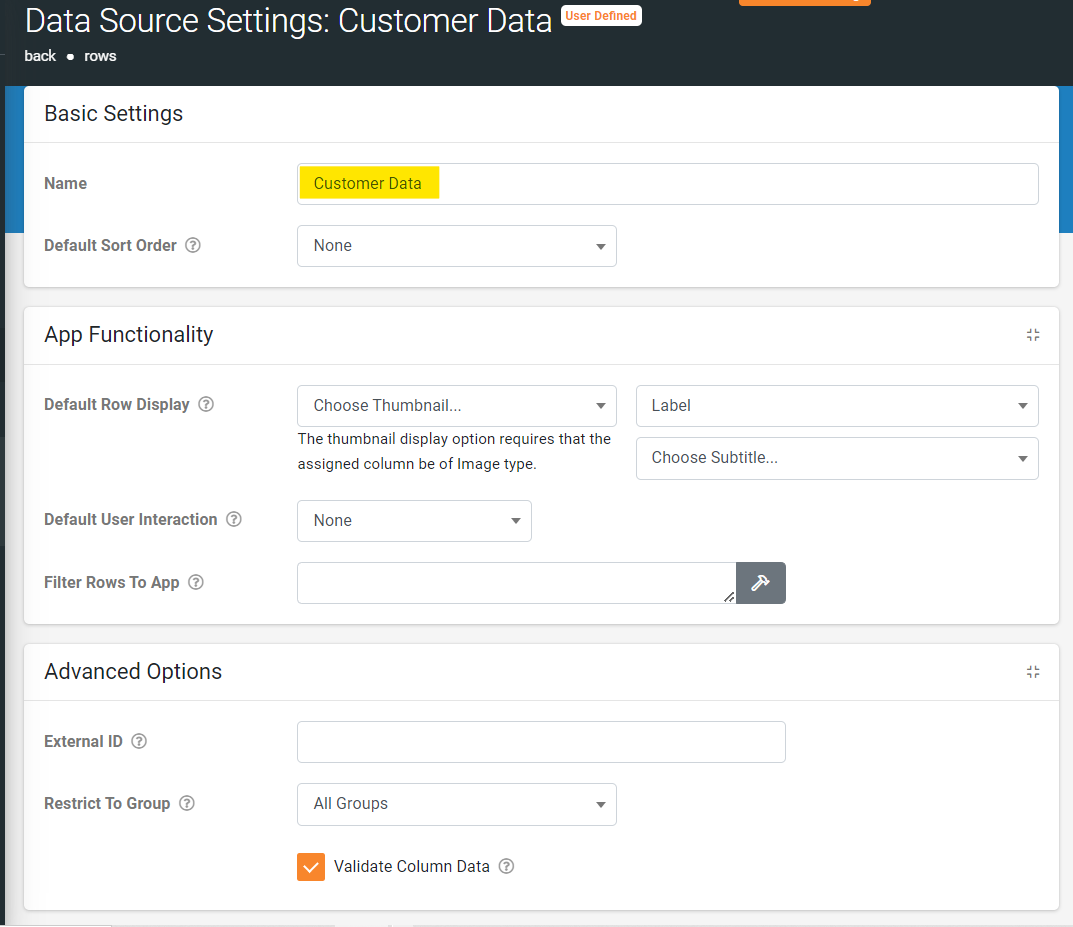
Now click 
This creates the Customer Data data source:

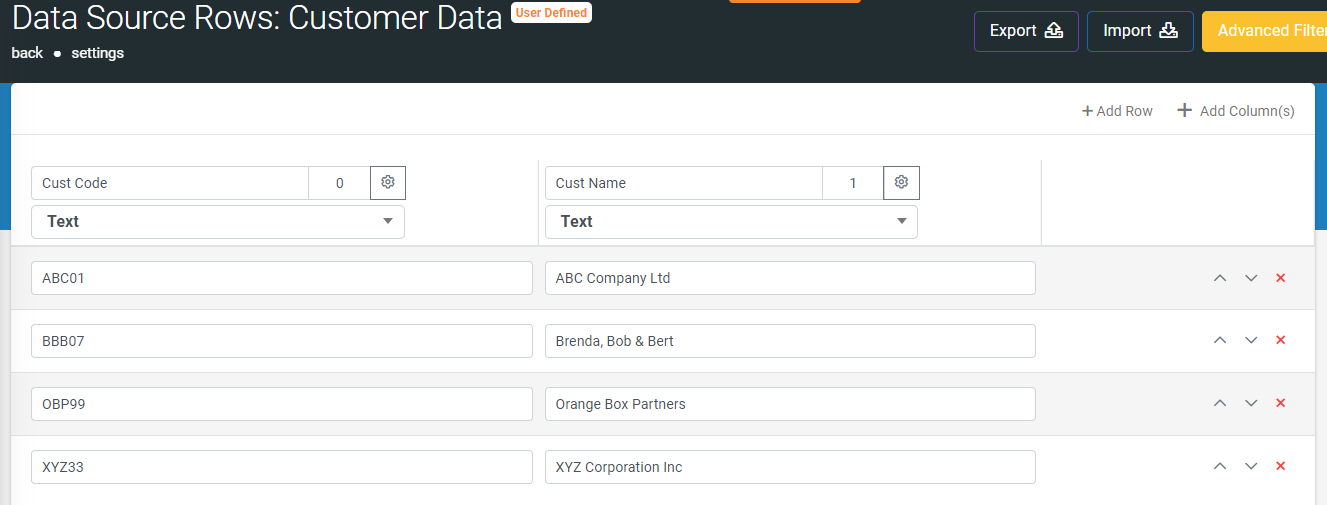
Click on the name to open the rows. This lets you setup the actual data for your Data Source. You can think of this as a spreadsheet, if you’re familiar with Microsoft Excel.
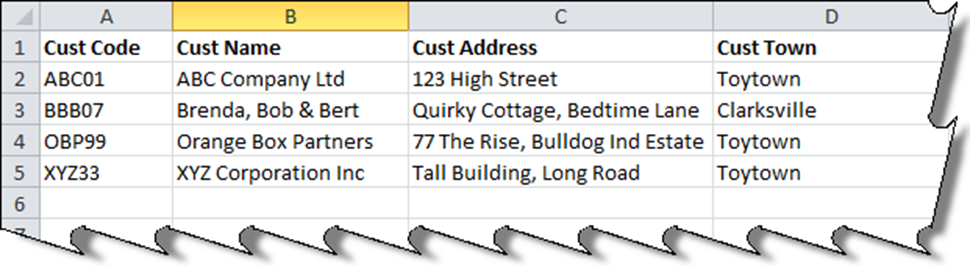
By default, you have two columns. The first is headed “Value” and the second is headed “Label”. If you would like to change these headings, you can type over them. Let’s call the left hand column “Cust Code” and the second column “Cust Name”.
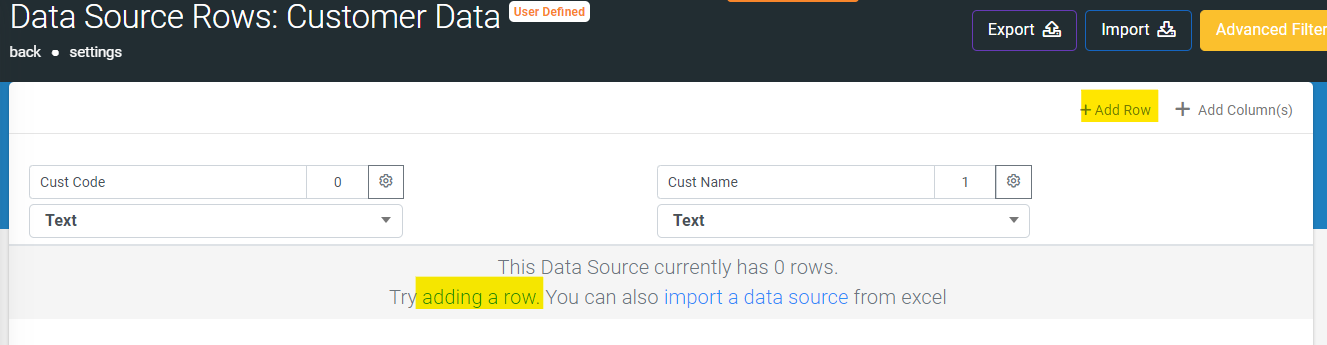
Now we can use the “adding a row” link or click on "Add Row" in the top right mini menu, to add some data rows – our actual customer data. We’ll need to add as many rows as we have customers…
If we wanted to, we could add further columns too. Perhaps they might be Customer Address, Customer Postcode, Customer Email, etc.
Obviously typing hundreds of customers in this way would not be feasible, but we can also import them from an Excel spreadsheet or from a CSV (text) file, using the 
…then you can import that into your Data Source.
But for now we’ll stick with our two columns and just four clients, to keep things simple. So click on the 
Now we have our Data Source, we can add the dropdown list to our form. Open your form. It's probably still in V2 Test, but if you have already published V2, create a new version so that we can make changes again.
The first thing we need to do is to delete the Text field called "CustName", as we’re going to replace it with a dropdown list, in other words a “Choices” field.
Click on the “Customer” field in your form. While you’re still hovering over it, on the right of the field, a box will appear, which has the name of the field (“CustName”) and a couple of icons in it. The icon on the left looks like two sheets of paper and would allow you to create a duplicate copy of this field. The icon on the right is a big X and that’s the delete option. Click on the X to delete the field.

The field will disappear from the form.
Now we can add a new field, this time a Choices field. So it’s time to click the Choices button again.

Give the field a Data Name of “CustDropdown” and a Title Text of “Select Customer”.
Now, under Answer Choices, select “Data Source”, because we are going to use one this time.
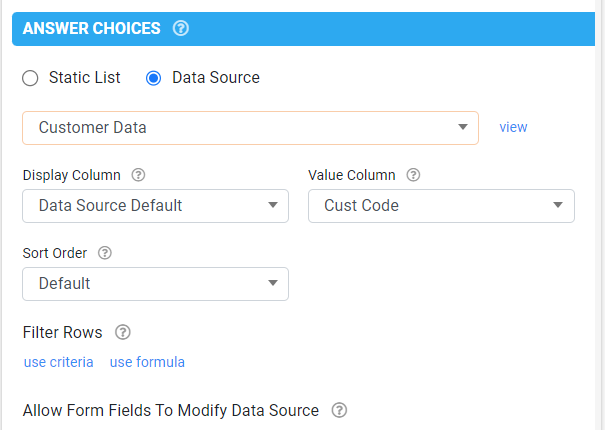
Make sure that the correct Data Source (i.e. “Customer Data”) is selected. This is the list of customers we just created.
Save and Publish your form, and give it a try in the app. You should find that you can now lookup the client for your job sheets from the new data source.