
Adding a New Data Source
Data Sources let you create and maintain data sets for use on Screens, saving you time by centralizing your data sets in one place.
Add a Data Source
When logged into the web portal:
- Navigate the left-side menu to Connected Data > Data Sources.
- Once on the Data Sources page, click the “Add New +” button in the top right corner.
The page will reload on the Create Data Source page, where Basic Settings and Advanced Options can be configured.
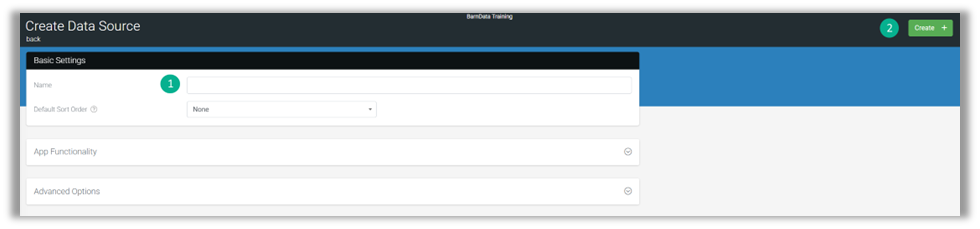
- Enter a Name for your data source (required)
i.e., Field Sales – Clients referencing the solution and containing data for easy identification when designing solutions and binding to fields. - Click the “Create” button in the top-right corner.
| Default Sort Order and Advanced Settings are optional and can be configured once the data source is populated if needed |
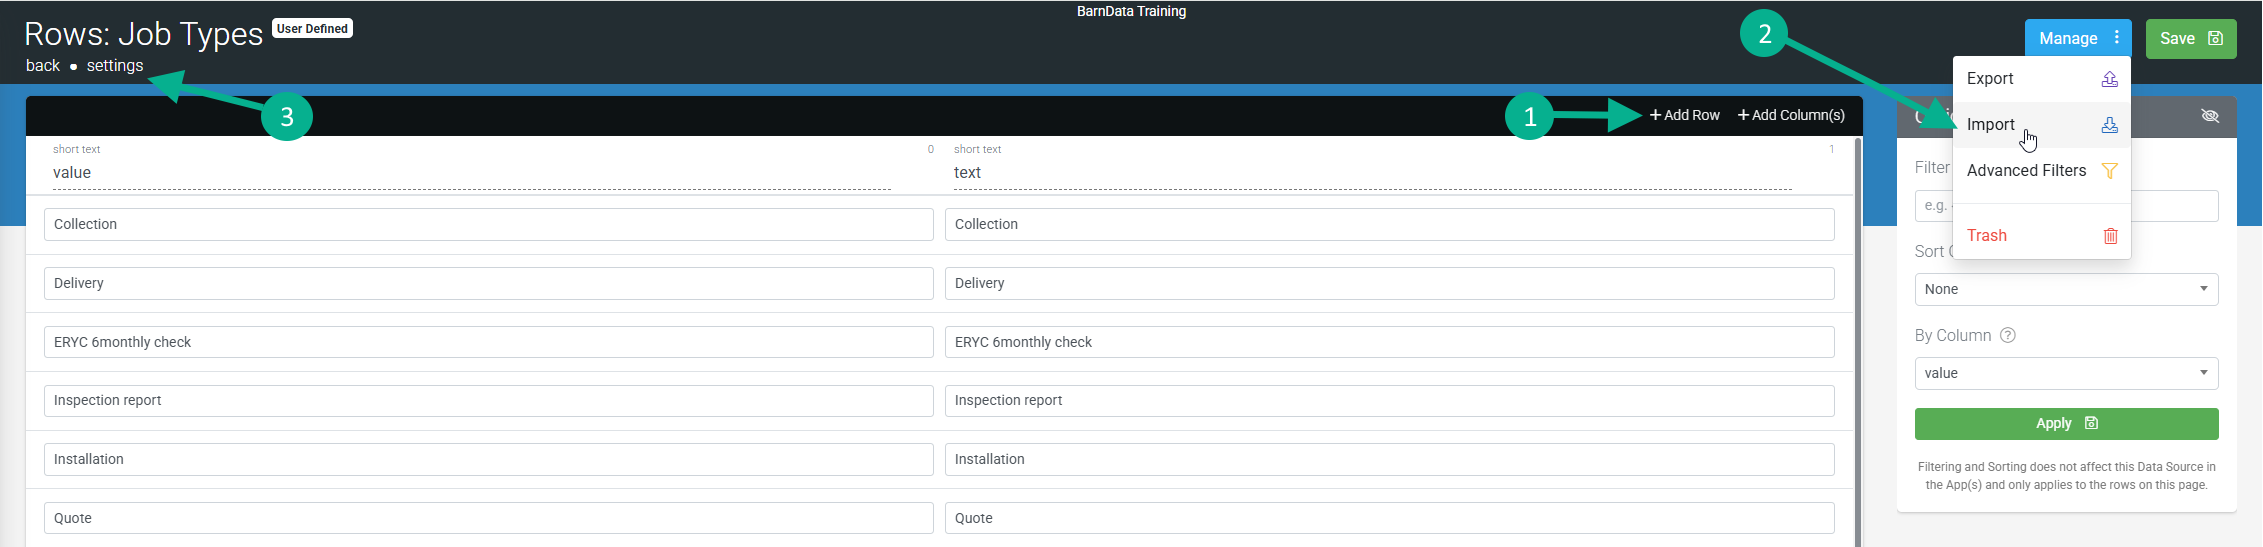
Finally, you’ll need to populate your data source for use in screens. This can be achieved in one of three ways:
- Manual cell data entry by adding rows/columns.
- Import an Excel/CSV file to create and populate row/column data.
- Pull data into the platform from an external system using a Data Source Connector (configurable on the data source’s Settings page).
Importing requires an Excel (.XLSX) or Comma Separated Values (.CSV) file, which MUST be in the required format.
- The first row of your file is assumed to be the data source headers, and the rest are just rows.
- The file must contain at least one row (excluding the header row) and two columns.
- The first column in all rows must be populated with unique values.
| When importing, a cloned copy of the overwritten data source is moved to Trash that can be used to restore the data source, in case of any import mishaps. |
A template of the required format can be obtained by clicking the “Import” button and the download link provided before importing a file.