
Manually Downloading Data
For information about automated export methods (i.e., e-mail or numerous other options), visit the Form Connectors section.
In this article
Export Single Form Entries via Feed View
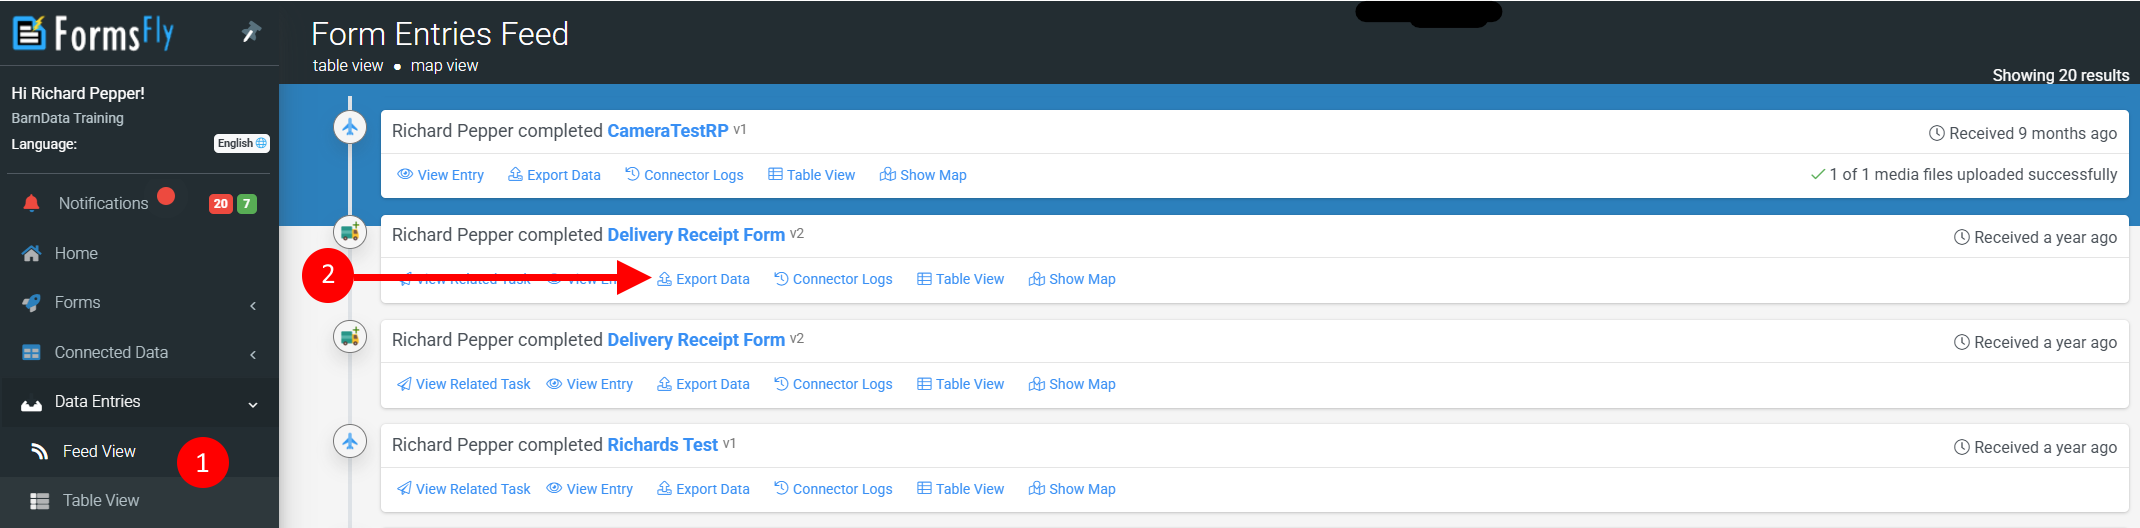
Single entries can be downloaded from Feed View. To do this, navigate to Data Entries > Feed View.
- Locate the record you want
Apply filters if needed. - Click Export Data opening Single Entry Export options.
Export Options
There are various options available for Single Entry Export.
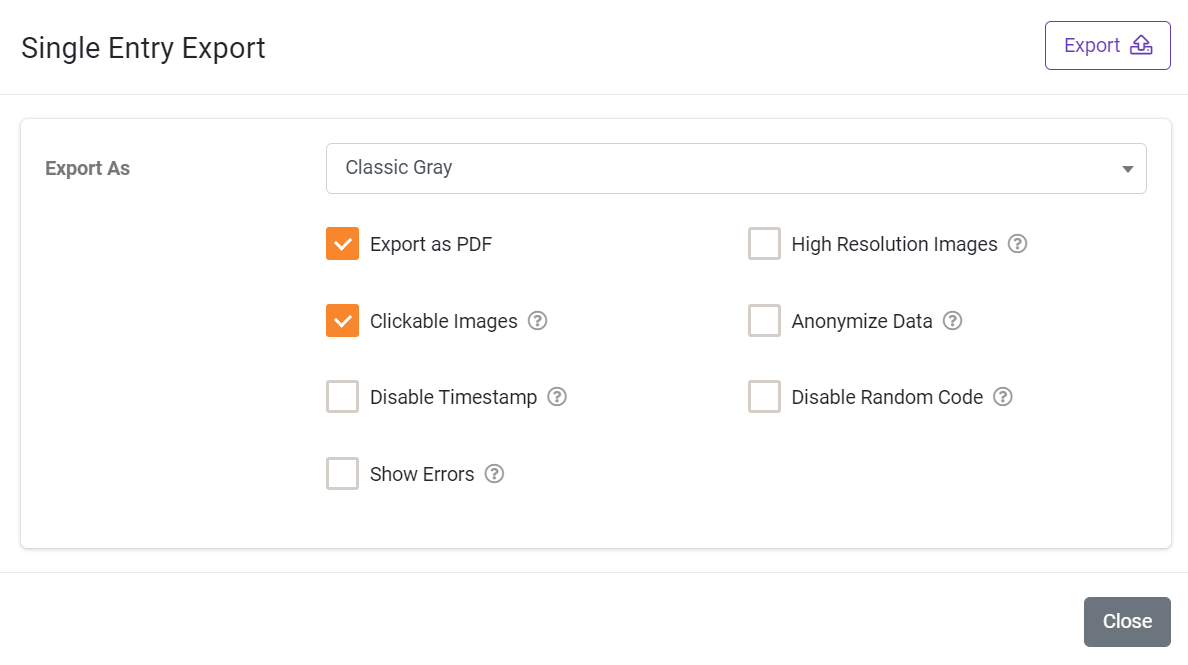
- Export As
Data can be exported using the Generic PDF layout or your layouts defined by Word or Excel templates. Select the layout to use from the dropdown. For more information, see Outputting Data with Templates. - Export as PDF
Data exported using Word or Excel templates will be created as PDFs by setting this option. If you leave this unchecked, the export will be created as a Word or Excel document, depending on the format of the selected template. - Clickable Images
By default, images embedded in file outputs are not clickable. Select this option to view images separately in a web browser by clicking or tapping on the file. Note that the image link in the web browser will reflect this portal’s web domain – if this is not desired, do not select this option. - Disable Timestamp
Disable the default system behavior of appending a date and time stamp to the attachment file name. e.g., instead of FileName-yyyyMMdd-HHmmss.pdf, the file would be generated as FileName.pdf. - Show Errors
Will display error messages highlighting incorrect formulae or syntax in the output. Useful for tracking down mistakes in your template. - High-Resolution Images
By default, images are output at a resolution of 96ppi (pixels per inch). This makes the generated size of output files smaller and thus faster to transfer. Selecting this option increases image resolution to 150ppi, boosting picture quality at the cost of a much larger output file size. - Anonymize Data
Fields marked as Personal Data (this choice can be toggled on the right-hand Basic Properties for each field inside the Form Designer under Advanced Options) will be converted to a non-human-readable format to aid privacy. - Disable Random Code
Disable the default system behavior of appending a six character random code to the attachment file name, e.g., instead of ‘FileName-abc123.pdf’, the file would be generated as ‘FileName.pdf’.
Once you’ve made all your selections, click EXPORT.
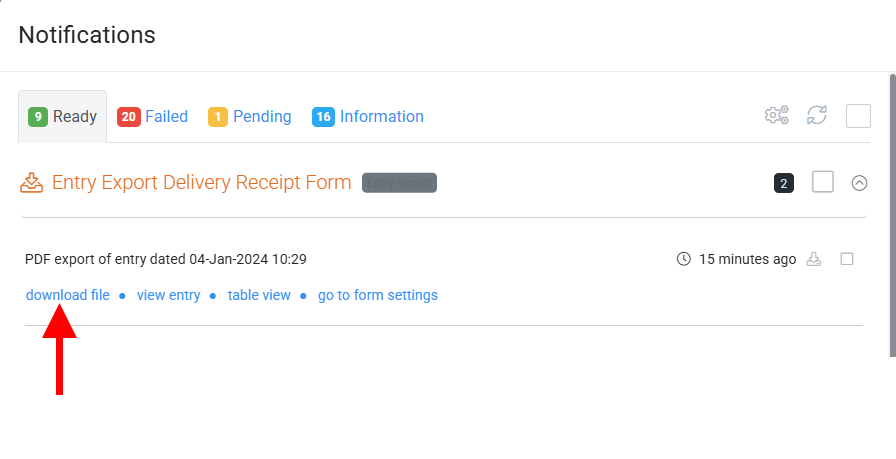
When the download is ready, a notification will pop up. Click the notification to download or navigate the side menu.

If you missed the notification, navigate the side menu to Notifications and download the file.
Export Single & Bulk Form Entries via Table View
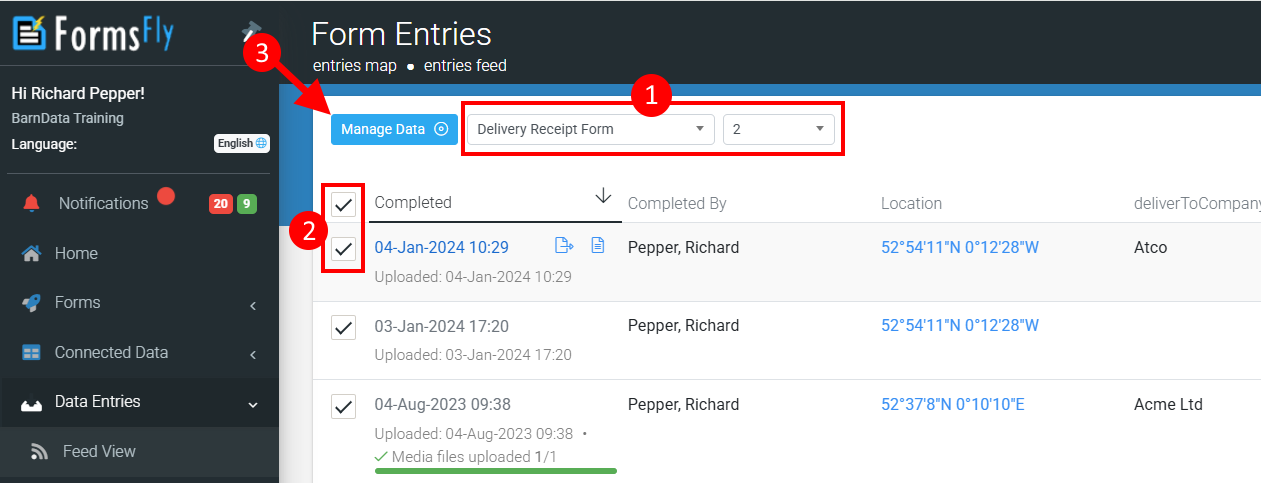
Single or multiple Form entries can be exported from Table View. To do this, navigate the side menu to Data Entries > Table View.
- Choose which Form and Form Version to display records from.
Apply a date filter if needed. - Check individual records or all.
- Hit Manage Data for export options.
Manage Selected Data
You can download the selected data in various formats with various options.
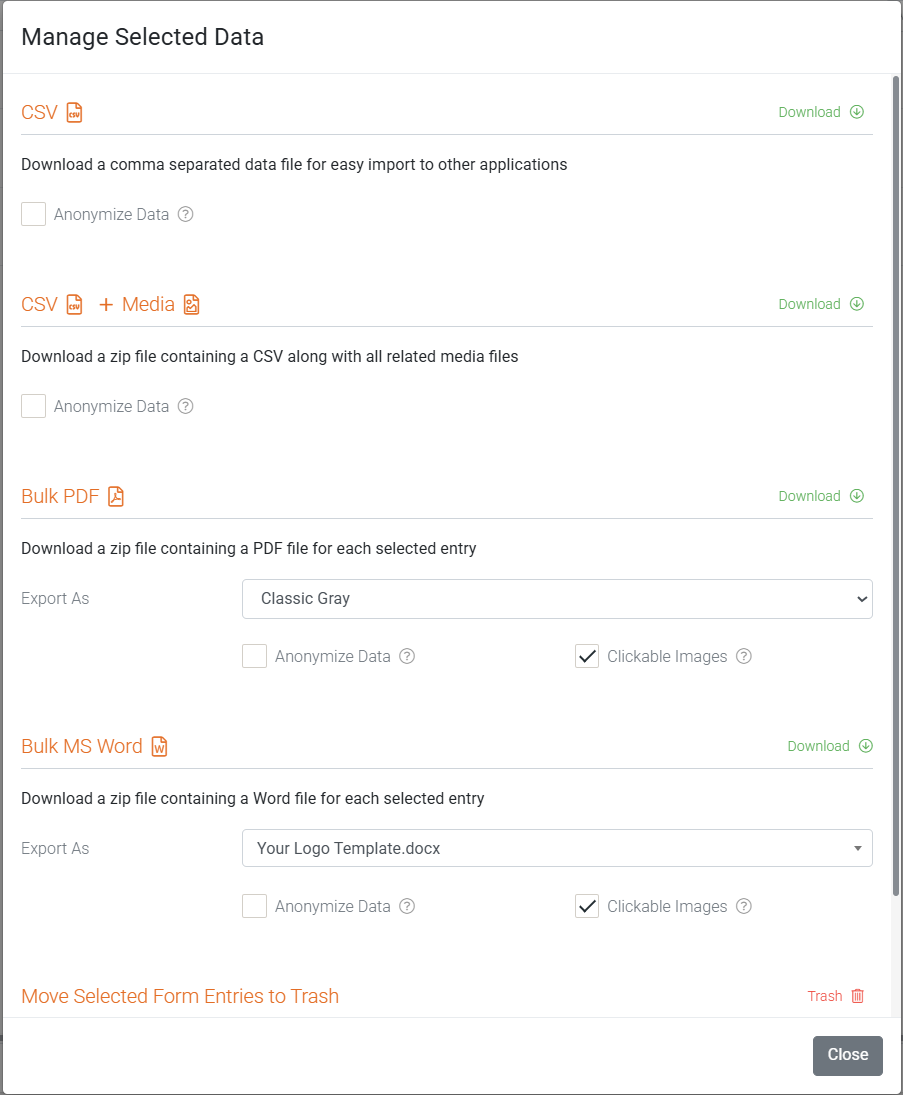
- CSV
Downloads the selected records as CSV (Comma Separated Value) file(s). - CSV + Media
Downloads the selected records as CSV file(s) with associated media files(s). - Bulk PDF
Creates a PDF document for each Form selected using either the Platform Generic template or one selected from those available in the Form. - Bulk MS Word
This option will only be available if a Word template has been attached to the Form. Select the one to use. - Bulk MS Excel: this option will only be available if an Excel template has been attached to the Form. Select the one to use.
- Anonymize Data
If enabled, data from fields marked as Personal Data will be converted to a non-human-readable format to aid privacy. - Clickable Images
By default, images embedded in file outputs are not clickable. Select this option to enable images to be viewed separately in a web browser by clicking or tapping in the file. Note that the image link in the web browser will reflect this portal’s web domain – if this is not desired, do not select this option. - Trash
Put the selected records into your account Trash.
Once you’ve made your choices, click DOWNLOAD. The exported data will download the same way as the Single Form Entry export.